Summary
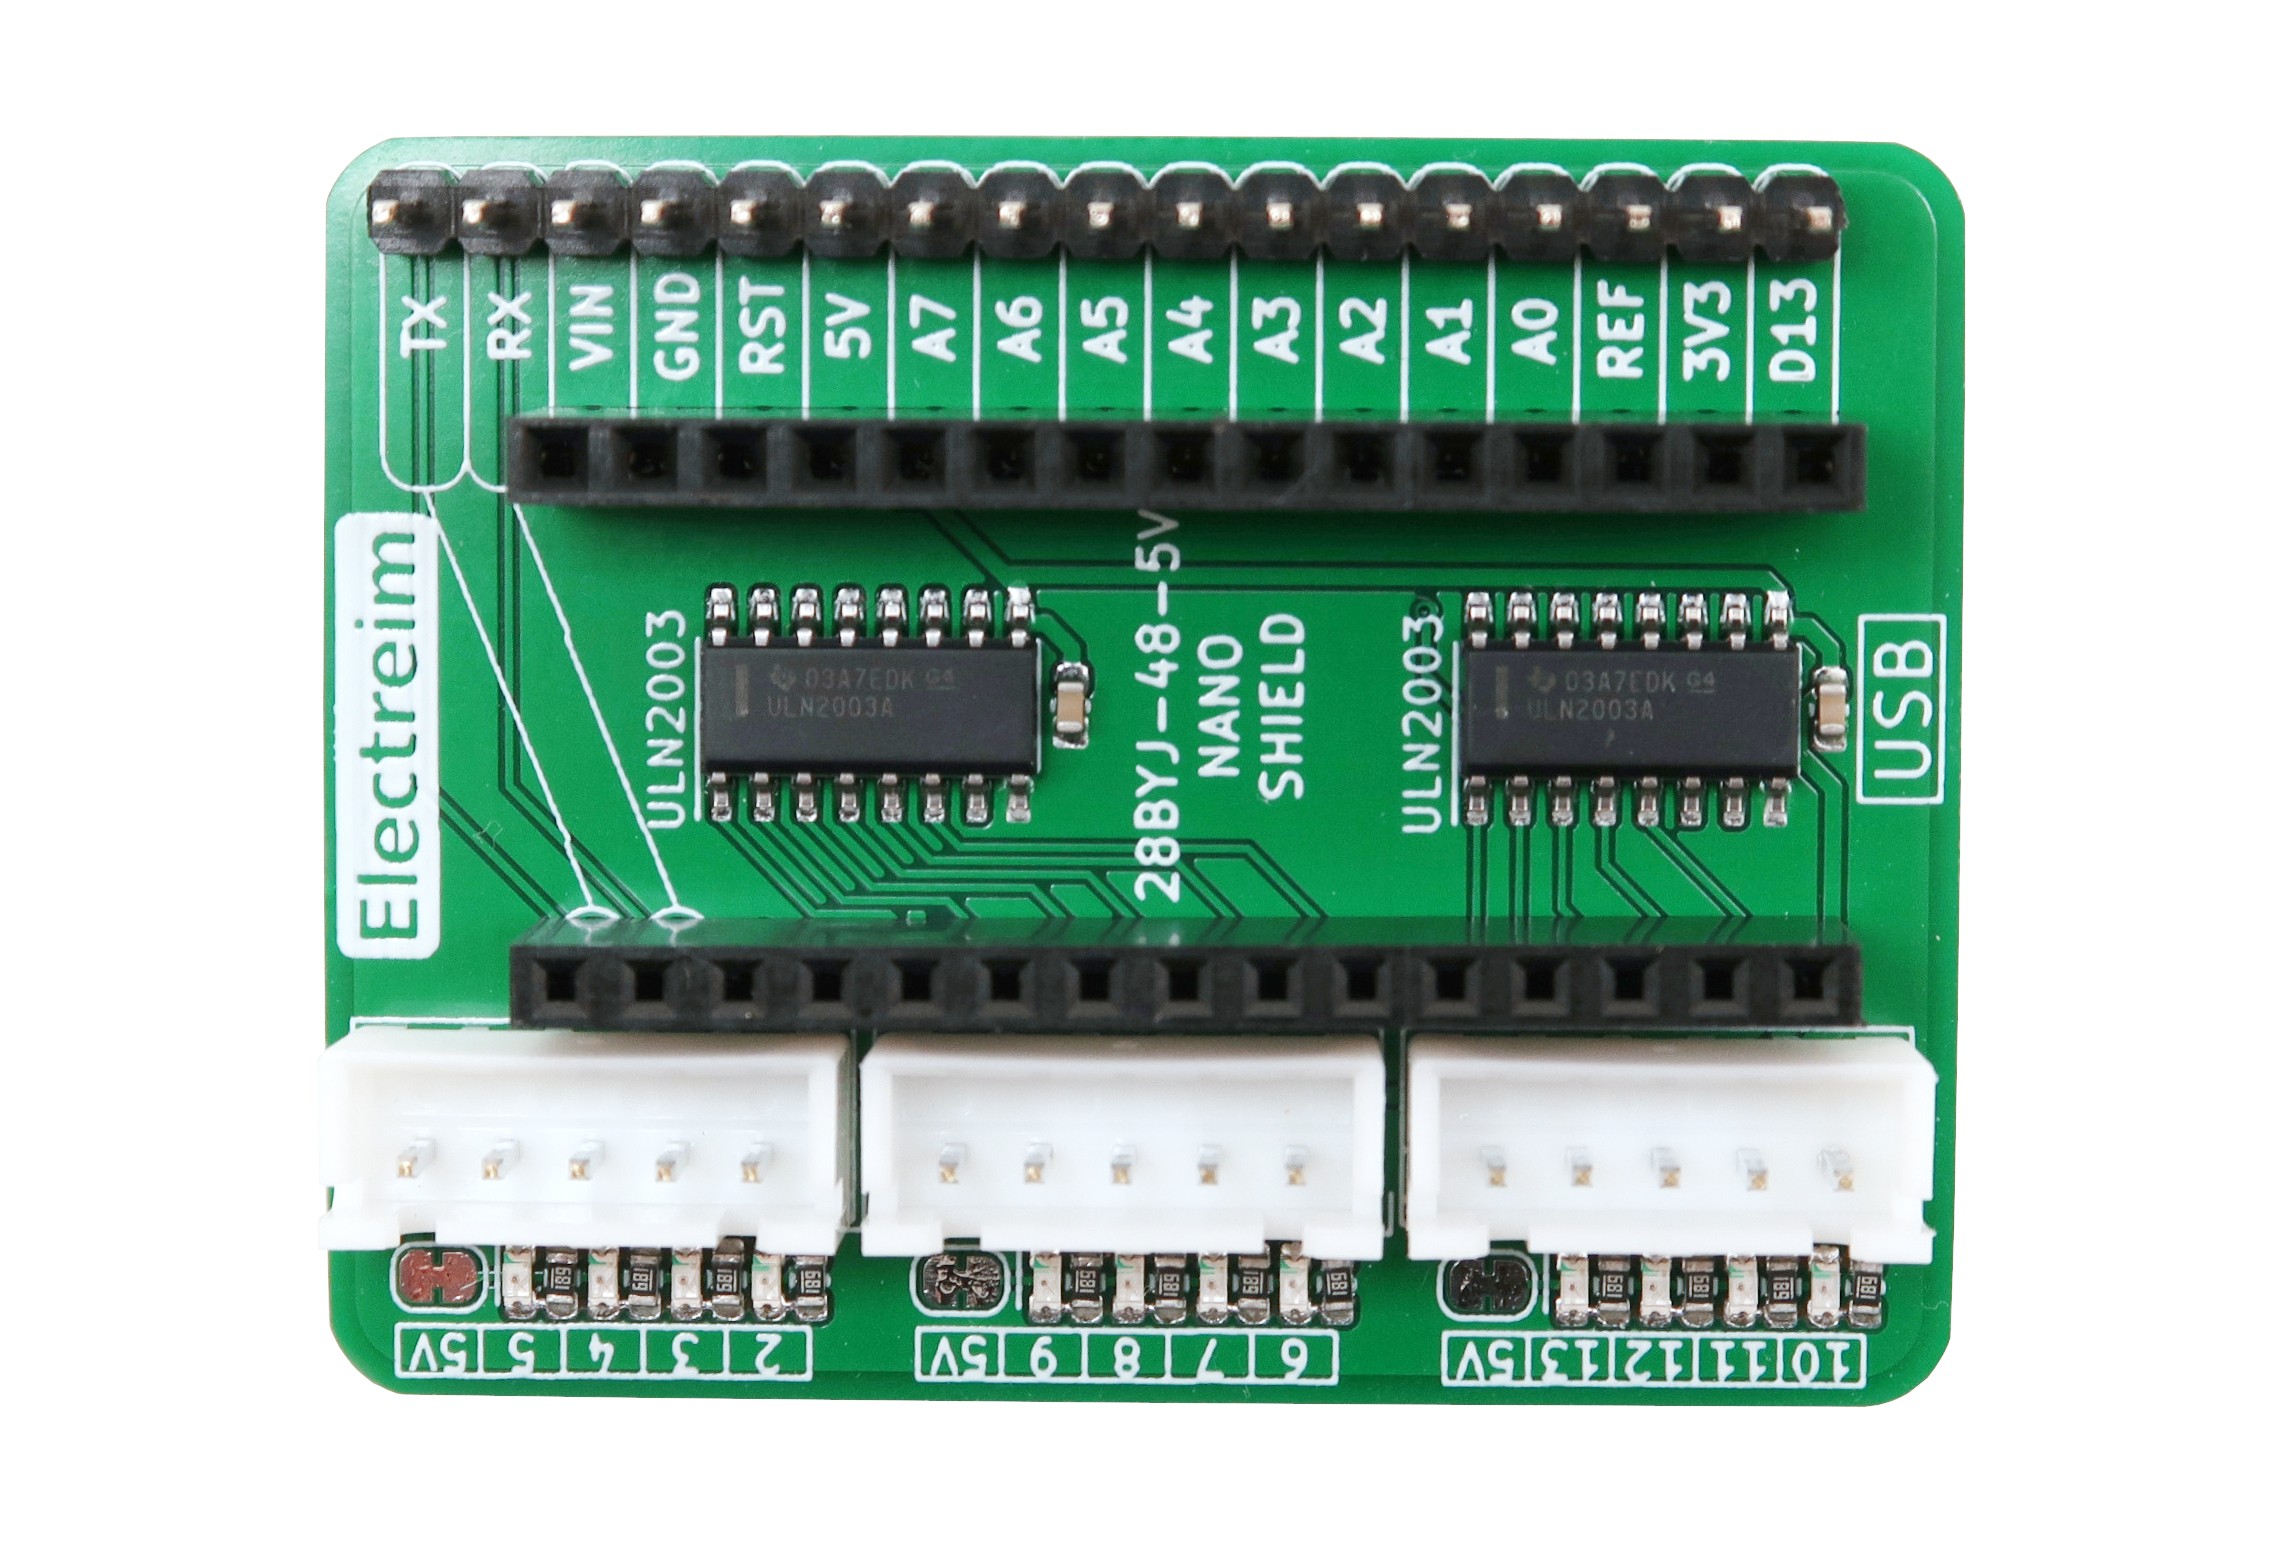
The Arduino Nano stepper shield uses the ULN2003A driver IC’s to power the stepper motors. Controlling the motors can easily be done using compatible Arduino libraries for the 28BYJ-48 5V stepper motors or writing your own code. The silk screen numbers in front of the white JST connectors show which IO pins from the Arduino control the corresponding motor coil. Red LED’s in front of the JST connector show which coil of the motor has power.
Pinout
Motor 1:
  Coil 1 -> D2
  Coil 2 -> D3
  Coil 3 -> D4
  Coil 4 -> D5
  5V -> 5V

Motor 2:
  Coil 1 -> D6
  Coil 2 -> D7
  Coil 3 -> D8
  Coil 4 -> D9
  5V -> 5V

Motor 3:
  Coil 1 -> D10
  Coil 2 -> D11
  Coil 3 -> D12
  Coil 4 -> D13
  5V -> 5V
Quick Setup
Place the Arduino Nano on top of the shield making sure to align the USB on the Nano with the USB silkscreen marking.
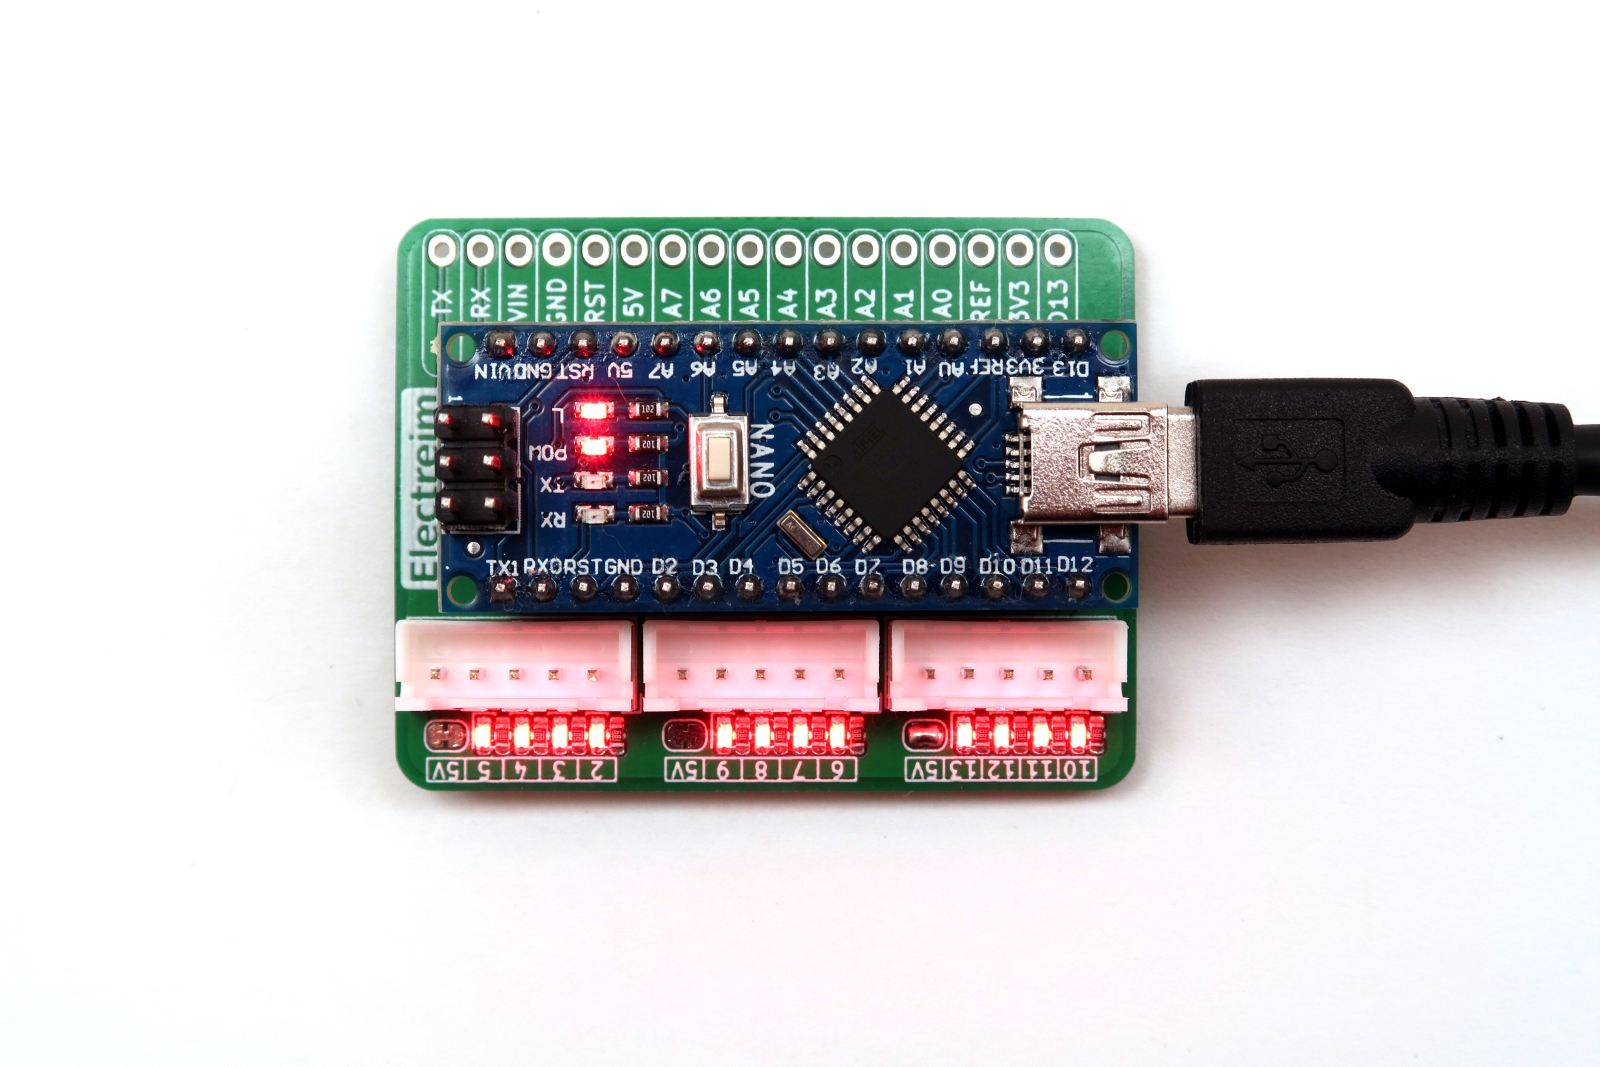
Plug in up to three stepper motors into the white JST connectors.
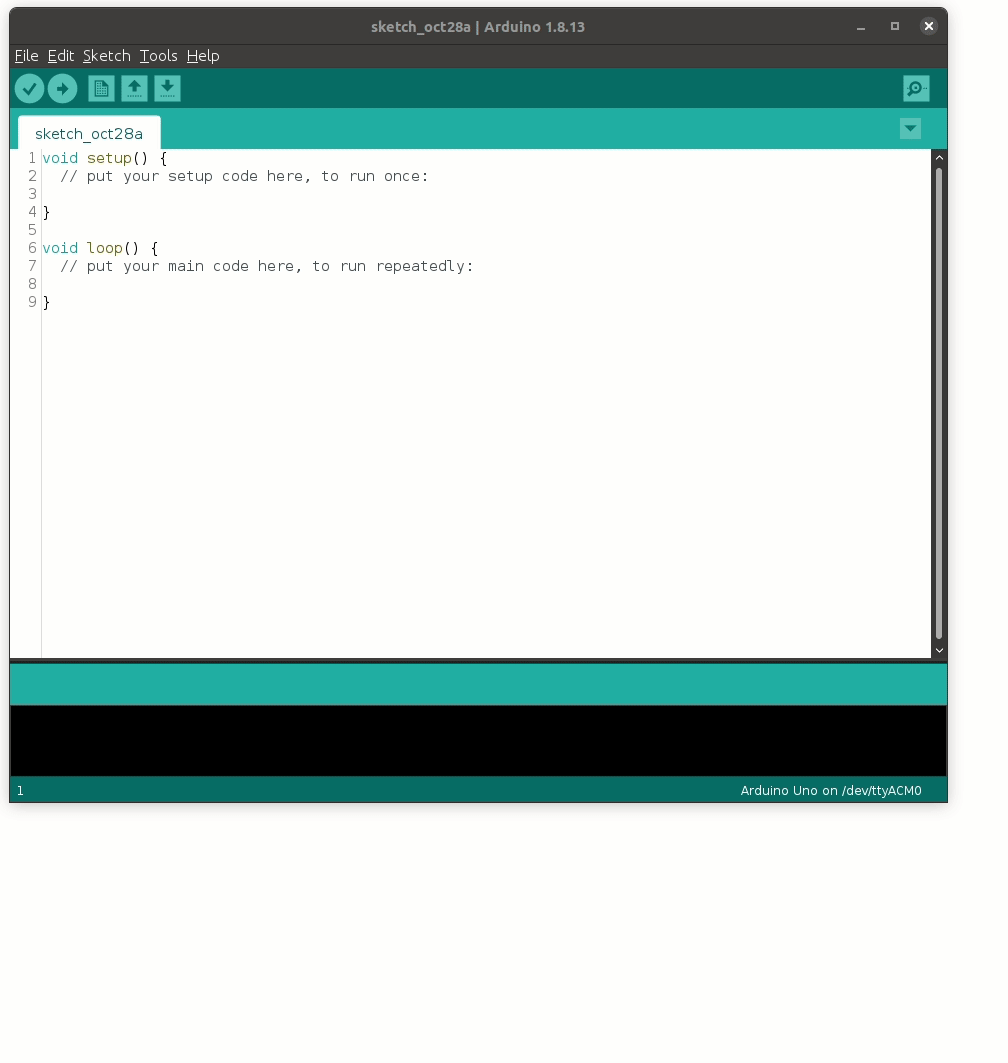
Connect the Arduino USB to a computer and open the Arduino IDE software.
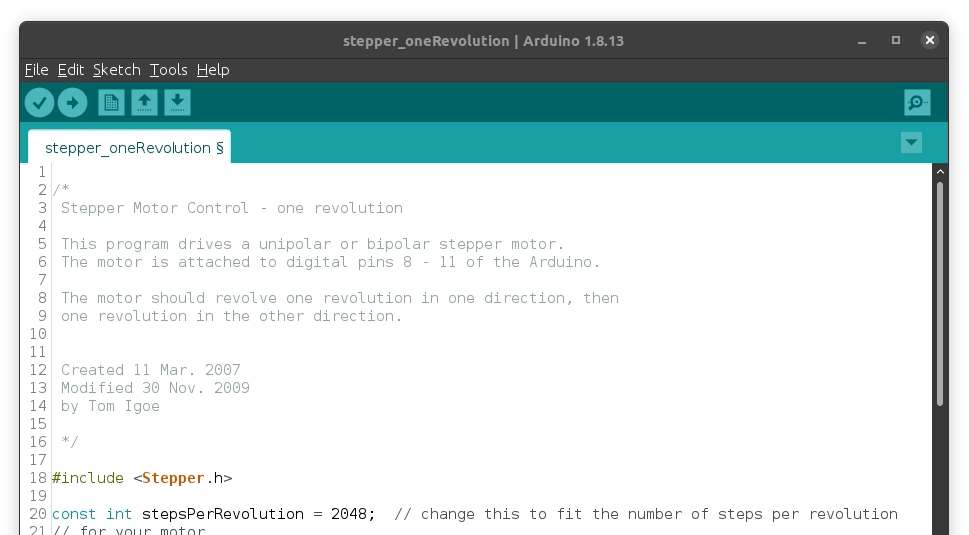
Open the example file: File > Examples > Stepper > stepper_oneRevolution
Change the following lines:
const int stepsPerRevolution = 2048;
Stepper myStepper(stepsPerRevolution,2,4,3,5);

myStepper.setSpeed(15);

Choose the Arduino board type and corresponding port.
Arduino Uno: Tools > Boards > Arduino Nano
The red LED’s on the shield should light up and the motor should start to spin if the Arduino sketch has successfully been uploaded to the Arduino. You are now ready to program the stepper motors for your next big project. Remember that you can use any stepper motor library that is compatible with the 28BYJ-48 5V stepper motors or even create your own.
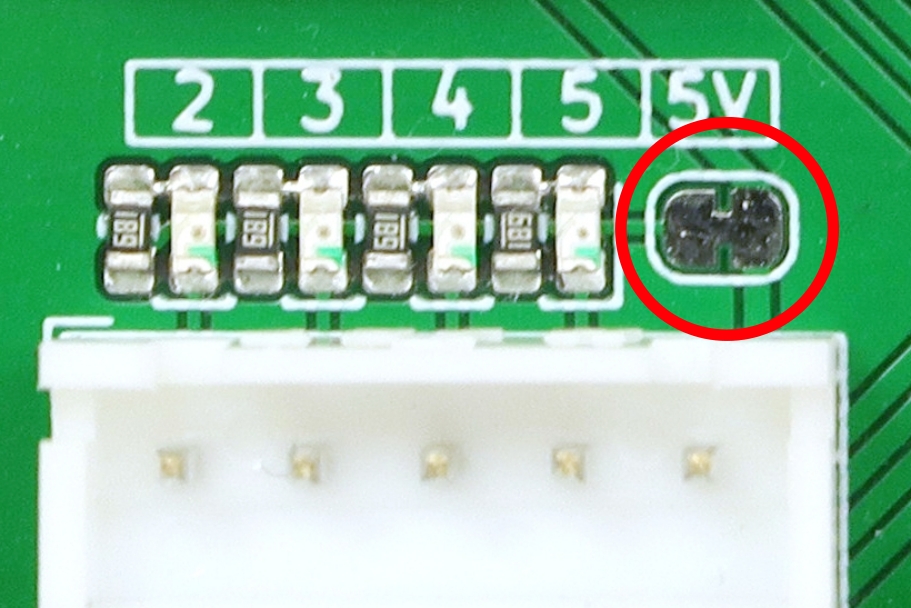
Disable LED
To disable the red LED’s on the stepper motor shield, carefully cut the jumper pads located below the 5V marking next to the red LED’s. If at any point you want to enable the LED’s again, simply add a little solder to bridge the two pads together.
Pin Sockets
The 28BYJ-48-5V Arduino shield comes with a 17 pin header that can be soldered to the shield for easy use with jumper wires. This can be useful if you still want to use the Arduino to control the stepper motors while using the other Arduino pins such as the analogue inputs. Wires can also be directly soldered into holes for projects that are more permanent or don’t want to deal with the hassle of jumper wires.